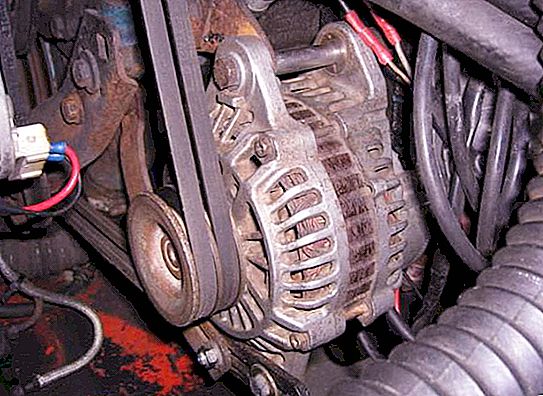
Perhaps one of the most important parts of the engine of a modern car is the generator. Priora from AvtoVAZ is no exception. There are so many electricity consumers in the car today that a lot depends on the generator power. But what if he suddenly “decided” to break down? Firstly, it is worth taking off.
How is the generator removed at the Prior?
Dismantling it may be required in many cases. Surely many "priorovody" faced with the fact that the replacement of the alternator belt on the "Prior" is required. Sometimes you have to change this detail, sometimes - somehow modify it. How long does it take to completely remove the generator? “Priora” - the car is quite simple, and therefore relatively little time is required. More precisely, 40 minutes, but sometimes you have to "pick" a little longer.
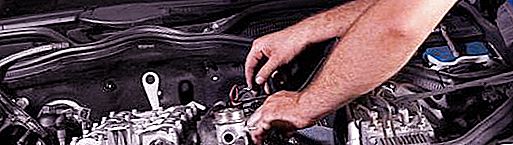
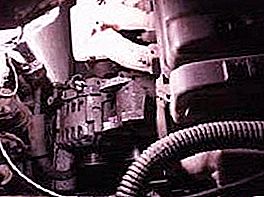
What is needed for this? Just the keys to "10" and "13". Be sure to remove the “negative” terminal from the battery. After that, we carry out the dismantling of the mudguard of the motor.
- We are looking for the output “D” of the generator, after which we remove the block of wire from there.
- We are looking for where the protective rubber cap “B +” is located, after which we unscrew the fastening nut that is under it (for this, use the key on “10”).
- The key to "13" weaken the tightening of the tension bar.
- Turning the adjusting screw counterclockwise reduces the tension of the generator belt.
Further work sequence
After that, carefully move the generator in the direction of the engine cylinders, after which we release the Priora generator roller from the belt. Then you need to carefully tighten and finally remove the adjusting bolt. A further sequence of actions will be as follows:
- It is necessary to completely remove the clamping bar.
- We turn off the bottom mount, remove the spacer sleeve. After that, gently holding the generator (“Priora” is not very convenient in this regard), in cramped conditions, completely remove the mounting bolt.
- It remains only to remove the clamping plate and completely remove the generator.
Accordingly, the installation of this part should be carried out in the reverse order. If your goal is to replace the alternator belt with Prior, you can proceed. After removing the old part, a new belt is pulled onto the pulleys. If the generator is removed, this is not difficult to do.
After this, in no case do not forget about adjusting the tension of the belt of the generator drive.
Can a burned out generator be repaired?
We’ll immediately warn you that theoretically this can be done, only there will be so much work that it’s much cheaper and easier to immediately buy a new part. But if you really wanted to show your abilities, you can try! Although in most cases the generator (Priora in this is no different from other cars) is a consumable item. The brushes and bearing change there, and rewinding it is another job.
What do you pay attention to when inspecting a removed and disassembled generator?
The most common problems include: short circuits between the turns on the stator winding, breakage of the rods (in the case of short-circuited rotors), cases of poor soldering in the winding (oh, this is a domestic quality), as well as a commonplace shorting of the same collector plates. You can determine them during flaw detection, which includes the following measures:
- Testing the quality of electrical insulation.
- Determining the degree of insulation on the winding.
- Evaluation of the quality of fit brushes.
Common causes of generator failure
Judging by the experience of domestic motorists, the most common causes of generator malfunctions are:
- Damage to anchor slats, which very often occur due to jamming of brushes, which is even more common when there is a complete lack of control over the degree of wear.
- Changing the configuration of the anchor (including its mechanical deformation).
- Very often the armature shaft is completely worn out. It is assumed that this phenomenon is a consequence of the low quality of the metal and the operation of the car in the North.
- Often you can see a burned winding. This, again, happens with the initially low quality of the part, as well as when operating the machine in a very dusty area.
- Damage or complete slipping of the anchor bandage.
- Detection of mechanical defects of the gearbox: it happens if some debris gets on the gearbox, or the Priora generator belt pulley is worn out.
- Mechanical wear of other parts of the generator is possible. It is possible that this was due to the excessively strong tension of the generator belt.
This is what the tightened belt of the Priora generator can lead to. 16 valves (engine) this is especially often "sin". However, on such motors, the belt tension should be controlled as often as possible, because otherwise the “valve wedding” is just around the corner.
Work sequence
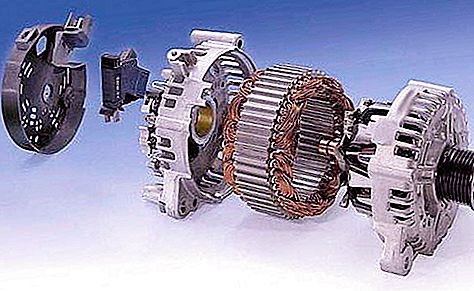
By the way, how do I disassemble the VAZ Priora generator? Note that this will have to work a little. First, you need to unscrew the three nuts on the rectifier unit, and then the two mounting sleeves on the plus terminal. If you do this, removing the bushings is not difficult.
There are six leads on the stator winding, which must be soldered as accurately as possible. The rectifier block is removed from the generator. Using a tester (this is very important), check the rectifier diodes. If they are normal, then the device will show a value of 580-620 Ohms. If it shows infinitely high resistance, then the diodes are probably broken. The entire rectifier unit, alas, must be completely replaced. So the positive and negative poles are checked.
Further disassembly
Take a picture or mark the relative position of the generator covers. Turn off fixing bolts, and then, having picked up a screw-driver, remove a cover. Take out and carry out visual inspection of the stator. There should not be any traces of touching the anchor about it (we already talked about this). If wear is noticeable, it does not hurt to change bearings or the generator cover.
Insert a hex wrench into the shaft bore. Holding the shaft, unscrew it. Remove the pulley and washer from the generator shaft. Gently knock the wooden mallet out of the mounts. Do this very carefully: if subsequently the part does not fall into place normally, then the generator belt spinning on the pulley will vomit it. "Priora" - the car is quite reliable, but there is a limit to any strength. So take your time!
If during rotation of the bearing you feel looseness, or you can clearly hear crunches, be sure to replace not only this part, but also the cover of the generators. To change the bearing, you must first unscrew the four washer mounting bolts, pull it out, and then everything else.
Other repair methods
So, back to the more serious topics. Is it possible to fix the generator? Lada "Priora" - a car repeating the best domestic traditions. Simply put, it is quite simple, and therefore there are few frankly “disposable” details in it. So in many cases the generator can be brought back to life, even if something really serious happened to it. Especially often this happens if you do not change worn generator brushes in time. In this case, the Priora will drive, but the part will be hopelessly damaged.
When the brushes are completely worn out, the wires completely abut their holder, as a result of which they first begin to sparkle, and only then an arc arises, burning lamellas. This “disease” is most susceptible to the generator on the Priora with air conditioning, as it is the most powerful.
How to bring the anchor in working condition?
Under industrial conditions, damages of this type are repaired by building up the copper by the galvanic method and then grinding it on a lathe. As you know, not everyone has such an opportunity at home, and therefore we offer you an easier way to bring the generator into working condition.
First thoroughly clean the anchor, and then treat the collector to remove residual melted copper. Remove all visible short circuits between the lamellas, and then check the anchor on the PCB and eliminate any hidden faults. Most often they do not burn out completely, the “dovetail” completely inside the plastic mount remains more or less intact, and therefore does not fall out.
Soldering "implant"
It is necessary to thoroughly clean the burnt place with a bur or similar tool. It is necessary to find a small piece of wire of this diameter so that it fits freely into the slot. The second piece should also pass freely into the expansion, snuggling snugly against the other side of the groove. This whole structure should be held in the nest as tightly as possible.
With the help of boron, the last residues of copper are finally removed, the prepared wires are laid, and then they are properly treated with solder. Do not spare material: excess solder will still leak when soldering a new lamella.


