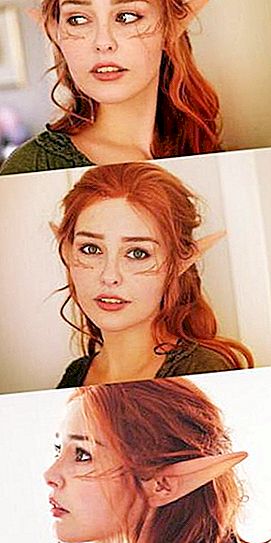
When going to a costume party, people think about what kind of image to choose for themselves. Trivial cats, bunnies and pirates are no longer relevant. And what kind of character can you dress up? It is worth considering the elf’s candidacy. Such an outfit is simple to do, you only need to find a light wig, a long white robe and earpads. And if you buy a wig and find clothes is not difficult, there may be a problem with the overlays. And its easy to solve. In this article we will tell you how to make elf ears with your own hands.
Cuffs

The easiest way to make elf ears is to twist them from wire. Of course, this option is more suitable for girls than for men. Cuffs are a beautiful piece of jewelry that today replaces many ordinary earrings. These accessories are fastened with clips or with their curved design. How to create such elven ears? For their manufacture, you will need a silver wire. If this is not available, copper can be dispensed with, and when the product is ready, it can be painted from a spray can. So let's get started. To begin with, you need to make a wire frame in the form of a leaf, and then start filling it. We make all kinds of curls and attach them to the base. Now you need to think about fastening. As it is possible to use a clip for clips or to build a similar part yourself.
Papier-mâché Ears
Even children can make such a “decoration”. Elf ears in this version are made of papier-mâché. But the basis will have to be made of plasticine. We sculpt the model, which we will subsequently paste over. You can make the same long ears that are shown in our example, or you can make something shorter and more elegant. When the base is ready, grease it with any fat. It can be a hand cream, sunflower or butter. We prepare paper. To do this, take a newspaper, cut it into small pieces and fill it with water. We give this substance time to insist. Now you need to take the base and stick on it the first layer of paper. When it dries, coat the newspaper with PVA glue. We add another layer. Again, wait for drying and repeat the procedure. When everything is ready, leave the workpiece to dry completely in any warm place. The next step is to free the ear from the base. Carefully remove the clay. We make the second blank by analogy with the first. Ears are almost ready, it remains to paint it with acrylic paint. For this purpose, you can use gouache.
Patch ears
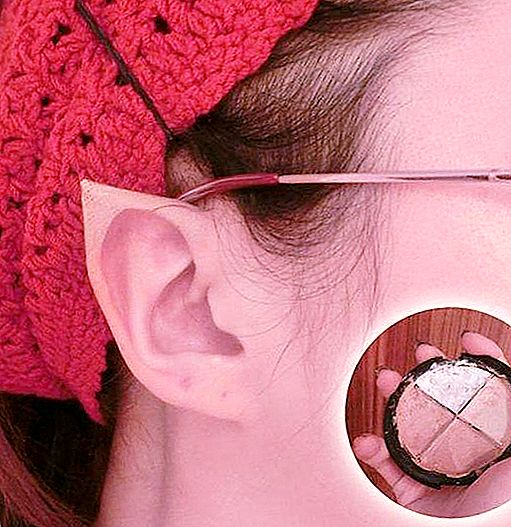
Brilliant ideas are always very simple to implement. How to make elf ears? The easiest way to make them from a conventional patch. It is best to take a catheter or one that matches skin color. Take a thin strip and glue it to the auricle. We bend the tips of the patch inward, and cut off the excess with scissors. That's all - the ear is ready. If it does not quite fit your skin color, then it can be painted with powder or shadows. Concealer is not recommended. It does not absorb into synthetic fabric.
Gummy ears

An interesting name, isn't it? What is gummosis? This is theater plastic. Often not only false ears are made of it, but also noses, cheekbones are fashioned, etc. To work with this material is as easy as with plasticine. How to make elf ears from gummosis? We put on a shower cap on the model so as not to stain the hair. Now we take gummosis and we fashion from it the sharp tip of the ear. It should serve as a continuation of the auricle of the model. When the work of creating the form is completed, you can begin to cover it with latex. This is necessary in order to give the workpiece a more realistic look. We apply from 5 to 7 layers of liquid latex, allowing each of them to dry well. At this time, you can create a lining on the second ear. When everything is ready, you need to sprinkle the latex with baby powder. Carefully remove the workpiece. Now it can be painted to match the skin. For this we use acrylic paint.
Paper ears

What should I do if a child comes home and says that he needs a suit by tomorrow? Invite him to become an elf. The costume can be made in just half an hour. Do-it-yourself elf ears made of paper in general in 10 minutes. To make them, you need a color printer. Print the image above. Now cut the ear along the contour. And don't forget to make a cut along the dashed line. It is thanks to this recess that the pad will stay on the ear.
Self-hardening clay ears

What is plastic, every needlewoman knows. But what is self-setting clay, not everyone knows. This is a synthetic material that resembles ceramics in physical properties, but it does not need to be heat treated. Do-it-yourself elf ears can be made from self-hardening clay. Just remember that the material is heavy, so you need to handle it carefully. After all, if the pad turns out too thick, then it will just fall off the ear. Therefore, the base should be made of foil. We give it the shape of a triangle, and then plastered with a thin layer of self-hardening clay. It is necessary to take into account the shape of the ear, so do not forget to make the patch embossed. After the workpiece dries, it will need to be painted. For this purpose, you can use acrylic or pastel. Both that, and another will need to be covered with a transparent opaque varnish. It is necessary to fasten such an overlay to skin glue.
Origami ears
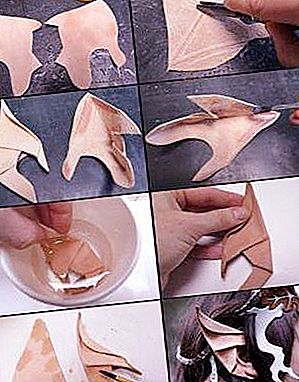
For the manufacture of such pads do not need to have the talent of a sculptor. Folding paper elf ears is a matter of an hour. You must print the stencil shown in the first picture. Ears are best made from thick paper or soft cardboard. Cut the workpiece. We put the pattern with a cutout to the right and with a clerical knife in the upper part we draw a triangle. We bend the workpiece along it, we do the same with the second part. We glue the parts and bend the semicircular protrusion outward. To give the workpiece an ear shape, you need to hold it a little in water. We take out the future ear and try on it. If necessary, it can be slightly deformed. Using the same principle, we make the second ear. Finished products can be painted, but can be left in white or brown.


